


Semantic HTML5 tags have been introduced in 2014 after that HTML4 was upgraded to HTML5. The goal of this new tags implementation was to help search engines to understand better what was the content present on a page.
Now with the help of HTML5 tags, you can indicate to search engines like Google, DuckDuckGo, and Bing which part of your website is for what. So instead to let search engine bots crawl plain information without instruction, they know exactly what they are crawling. Game-changing you think? Oh yes!
As you know, Google always wants to improve its algorithm so it didn’t take long for them (and other search engines as well) to start using them (HTML5 tags). Now with the help of Semantic HTML5 tags, Google knows exactly what they are crawling, which avoids any misinterpretation that could be made by the bot!
Why Semantic HTML5 Tags Are Important?
Semantic HTML5 tags are important because they give meaning to the content present on a page, making it easier for search engines to understand the structure of the page they visit. Which part is the header? Does that section is the menu? Where start the main content, and where it ends? This tells search engines all this stuff!
Without HTML5 tags, search engines don’t know what is what. This means that they consider the elements of your menu, header, and footer, as all part of your content. A problem you think? Indeed it is! You are working so hard to optimize your content for SEO but you dilute your relevance with elements that may not be relevant to your content, like an address in your footer… or a menu mentioning multiple topics?
There is no doubt that implementing Semantic HTML5 tags (also called Semantic HTML5 elements) helps to improve ranking. In a case study done in 2017, Hugo Scott, a technical SEO specialist, got a client’s website to increase by 30% right after the implementation of HTML5 tags.

How to Implement Semantic HTML5 Tags?
The good news is that implementing the HTML5 tags isn’t difficult and can be automated with most platforms. In WordPress, most SEO-friendly themes have them implemented already. The cases where HTML5 tags aren’t properly implemented happen mostly when people are using a bad theme, or have built their site from scratch, using pure codes or a site builder.
Have you already wondered why your site tanked after a new design layout? Have you made your new site using a custom builder like Elementor, Oxygen, or even just using Gutenberg blocks?
If yes, then there is a big chance you have forgotten to assign the proper HTML5 tags to your sections. Actually, it exists 10 different tags you can use to help search engines understand your content.
Popular Semantic HTML5 tags and their use cases:
- <header> – Used to define the header of your site.
- <nav> – Used to define a navigation area, typically containing links.
- <section> – Used to define a section (under another tag like <article>).
- <article> – Used to define the content zone of a page.
- <aside> – Used to define content related to (or not) the main content, but separate from it. Like a sidebar.
- <footer> – Used to define the footer of your site.
- <main> – Used to define the main content of a page. (Normally between <header> and <footer>)
- <figure> – Used to define an image or illustration.
- <time> – Used to define a date and/or time.
- <summary> – Used to provide a summary of the contents.
Now that you know the most popular HTML5 tags and their use cases, let me show you how I use them!
I have 2 different webpage layouts, where html5 tags are implemented differently. Let me show you!

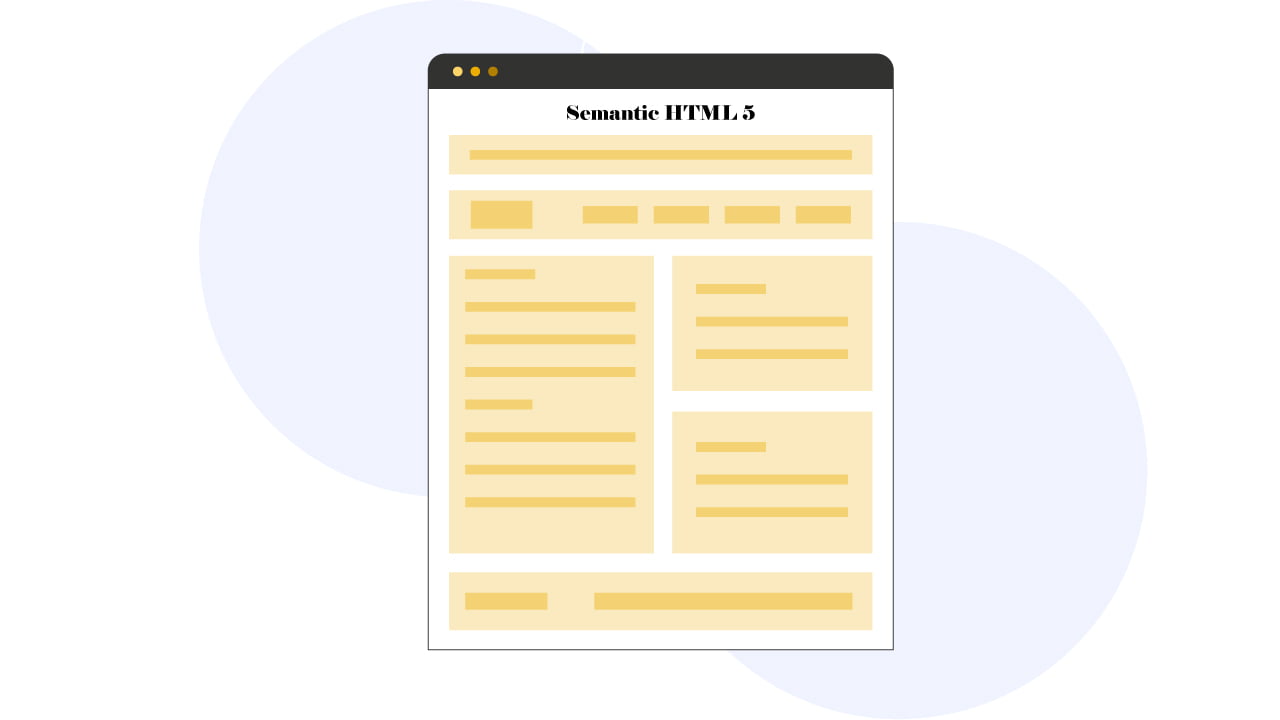
In this layout, you will notice that the <aside>, aka my sidebar, isn’t inside of my <article> tag. This is important when you use your sidebar for something else that isn’t related to your content to create the section <aside> OUTSIDE the <article> tag.
This is a pretty simple but popular layout, that you can see on probably 90% of the sites that have a blog section, with articles. You have your header, your content zone where the article is, and then, the footer. A sidebar that is used to show extra content.
In this case, I only use the sidebar to show ads and because I don’t want the content from my ads to interfere with the relevancy of my main article, I’ve put it outside my <article> tag.
To keep it simple, just remember that if a tag is inside another tag, it should be relevant to this parent tag.
Actually, you see from that layout that my article is split into different chapters (different headings). Each header is a section, hence why it’s okay to have the tag <section> inside my parent tag <article> to illustrate the different sections of my article.
Note: This is totally fine to have multiple headings and paragraphs in the <section> tag. The illustration has been made for illustration purposes only, to show you the concept of “zones”.

This layout is the opposite of the precedent layout. I use this layout when I have related content in my sidebar, like a widget for showing related articles, or a table of content.
Because the content that is inside my sidebar is now relevant to my main article, this is important to keep the <aside> INSIDE the <article> tag. Because it is relevant to my article.
This is not complex science, this is actually a pretty simple concept. Search engines analyze the contents inside each tag, and they know the content is relevant to another one when the tag where is placed this content is a child to another parent tag.
Using the different Semantic HTML5 tags that are available, you just help search engines to better understand your web pages. Why let Google or other search engines guess when you can show exactly the meaning of your content to them?
How to Automate the Semantic HTML5 Tags?
My favorite stack for WordPress is GeneratePress and GenerateBlocks. You can create global elements for everything; header, footer, menu, content zone, sidebar, etc…
In GeneratePress, when you select your container, you can decide which HTML5 tag you want to assign to it.
Click to select your container in the structure view mode:

And then once the container is selected, go to the Block settings, and assign your HTML5 tags.

Voilà! That’s as easy as clicking on a button 🙂 You just have to create global elements, assign them the correct HTML5 tags, and your Semantic HTML5 tags will be synced across your entire site.